Knowledge Base Authorisation using Amazon API Gateway
We take a tour of the authorisation methods that are available with Amazon API Gateway and try them out using Postman.
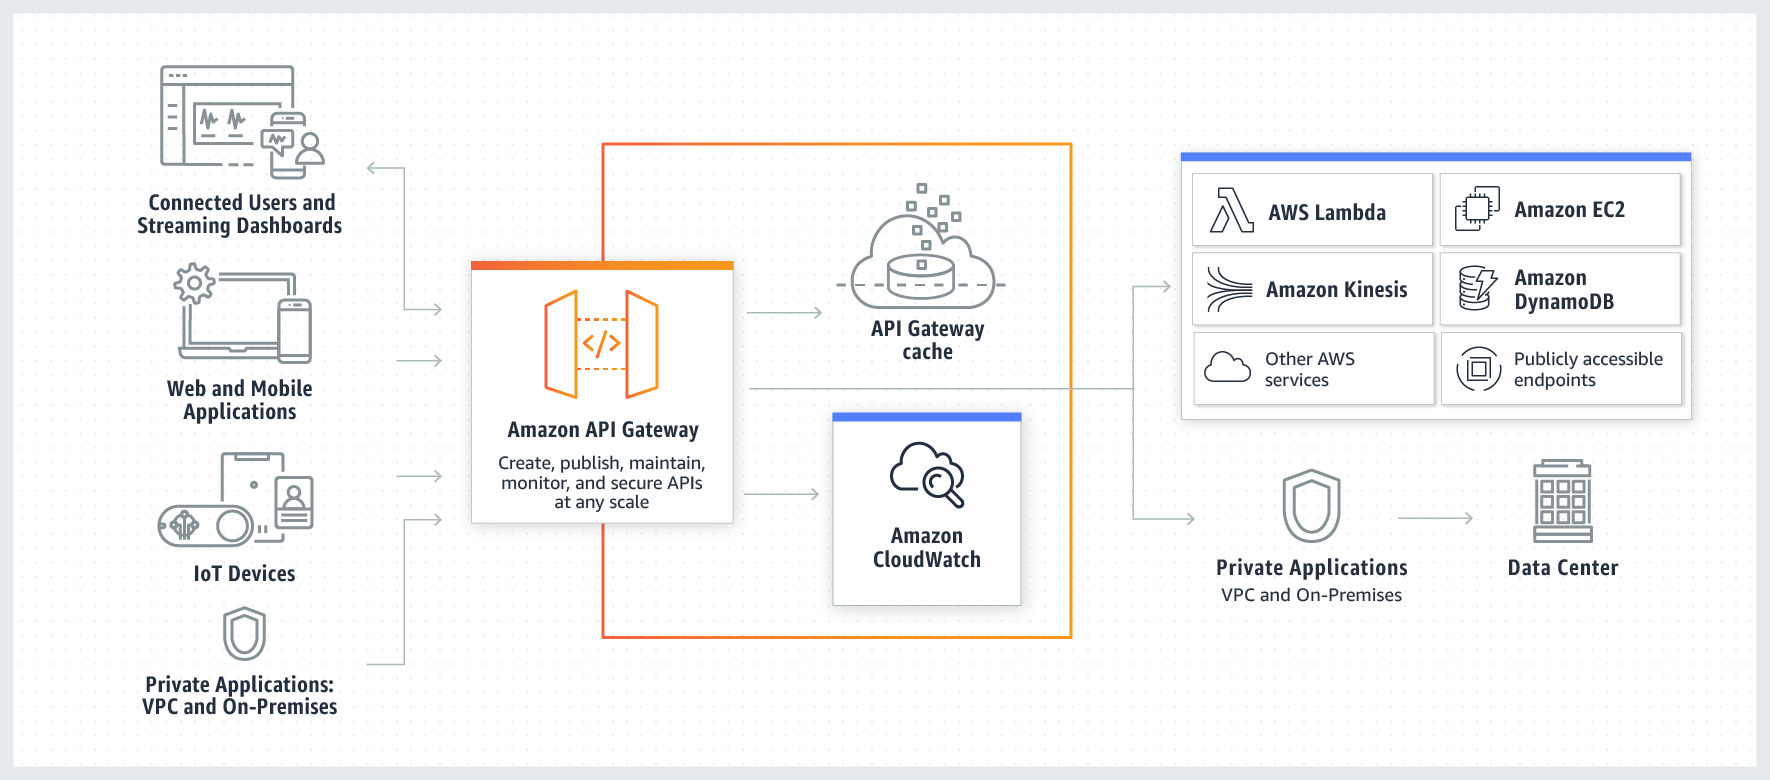
According to the marketing spiel, Amazon API Gateway is “a fully managed service that makes it easy for developers to create, publish, maintain, monitor, and secure APIs at any scale”.
Despite the 2015 launch, I only properly started to review its capabilities earlier this year. As per the guidance, the first thing I did was build the example Pet Store REST API. This creates a demo API with a couple of resources with GET methods to help you quickly get to grips with how it works.
More recently, I looked into authorisation methods and, as you would expect, found several options available. This article provides a run-down on these options and how to test them using Postman.
Usage plans and API keys
API Gateway provides usage plans and API keys to allow your customers to “access selected APIs at agreed-upon request rates and quotas that meet their business requirements and budget constraints”.
API keys can be associated with one or more usage plans, and usage plans can be associated with one or more deployed stages of your API (such as production, test and so on). The aforementioned request rates and quotas are attached to usage plans rather than individual API keys.
- Limited to 500 API keys per region (but can you request an increase)
- Ideal for controlling throughput, not authentication and authorisation
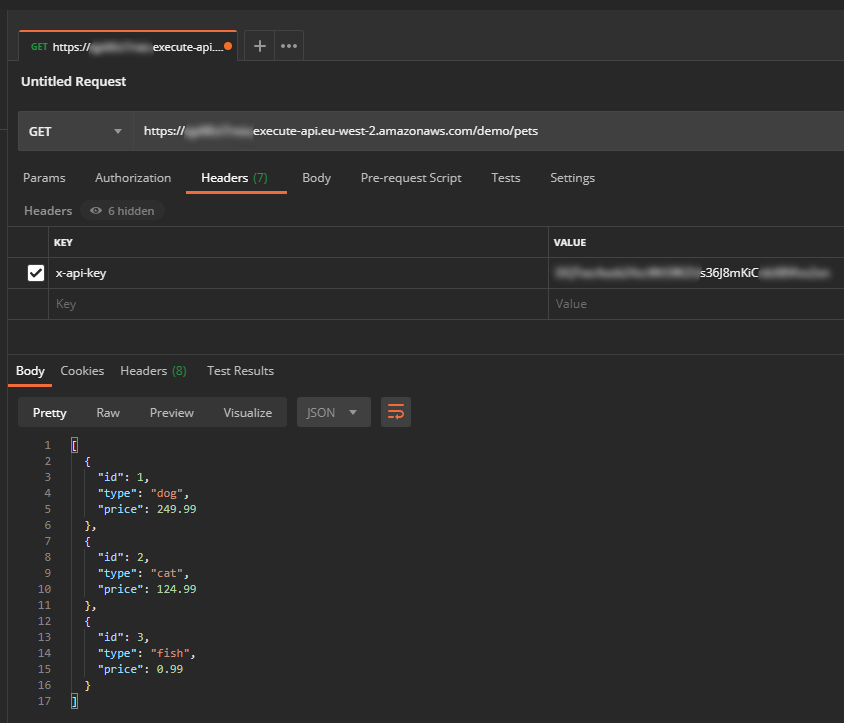
- API keys must be passed in a header key called x-api-key
Example: Add an API key requirement to an API resource method
- Go to the API Gateway console and select your existing API (e.g. PetStore).
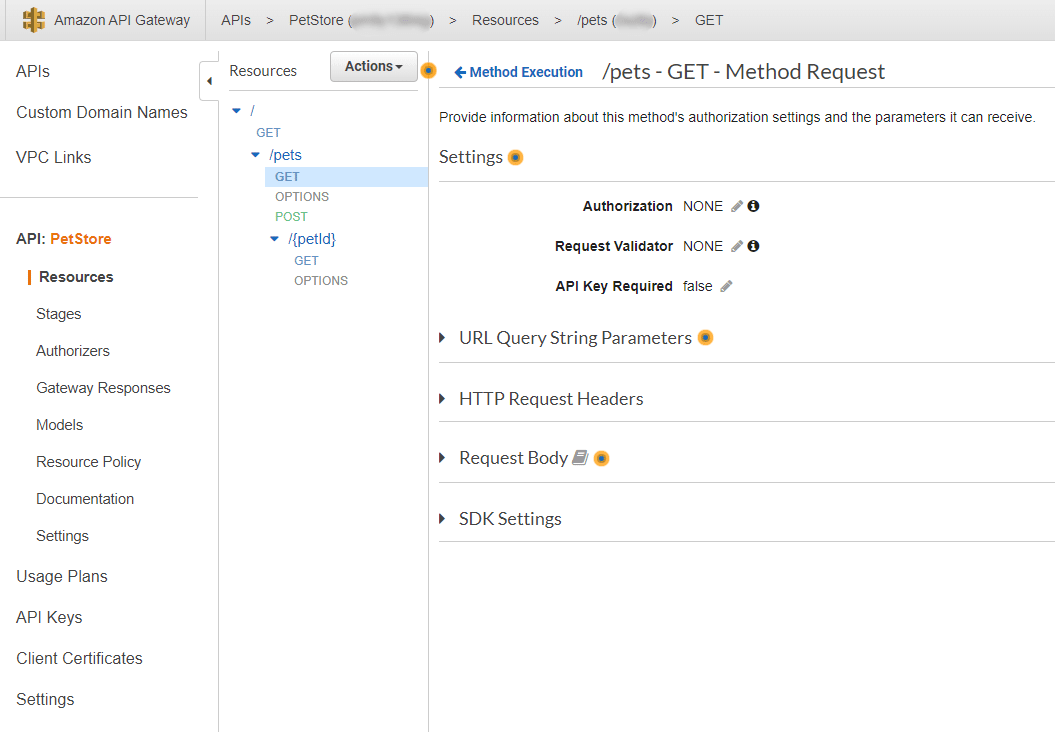
- In the Resources pane, select the Method Request for the API resource method you wish to update.
- Set API Key Required to true.
- Deploy your API to a new or existing stage.
- In the Usage Plans pane, create a plan with your preferred throttling and quota values.
- Associate the usage plan with the stage you deployed above.
- In the API Keys pane, create an API key and associate it with the usage plan.
- Try a request to the API resource method using Postman. You should find your request is successful only when you include a valid API key in an x-api-key header key.
IAM authorisation
You can use IAM authorisation with API Gateway to first authenticate and then authorise an IAM user that has permission to invoke your API.
- Provides authentication and authorisation using IAM users
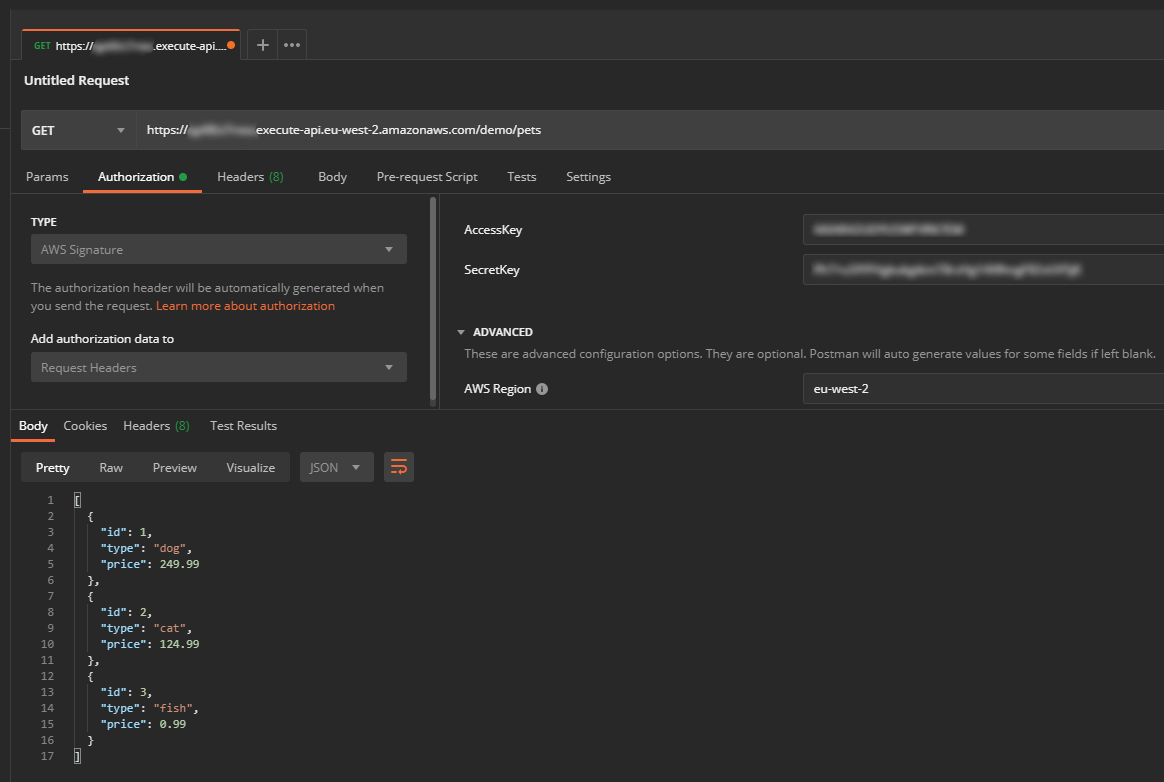
- Access key and secret access key need to be added to each request using the Signature Version 4 signing process
Example: Add IAM authorisation to an API resource method
- Go to the API Gateway console and select your existing API (e.g. PetStore).
- In the Resources pane, select the Method Request for the API resource method you wish to update.
- Set Authorization to AWS_IAM.
- Deploy your API to a new or existing stage.
- In the IAM console, create a user that has permissions to invoke the API resource method that you updated above:
{ "Version": "2012-10-17", "Statement": [ { "Sid": "PetStoreGet", "Effect": "Allow", "Action": "execute-api:Invoke", "Resource": "arn:aws:execute-api:{Region}:*:{API identifier}/demo/GET/pets" } ] } - Try a request to the API resource method using Postman. Your request will need to include an AWS Signature that contains API region and the user’s access key and secret access key.
Cognito authorisation
API Gateway allows you to connect with an existing Cognito user pool to control who has access to your API. With this approach, Cognito handles the user authentication and returns a token. That token is then presented within each request to your API and verified by a Cognito authoriser associated with your API.
- Uses a Cognito user pool for user management and authentication
- Cognito authoriser associated with your API handles authorisation
Example: Add a Cognito authoriser to an API resource method
- Go to the API Gateway console and select your existing API (e.g. PetStore).
-
In the Authorizers pane, create a new authoriser:
Name: MyCognitoAuth
Type: Cognito
Cognito User Pool: The region and name of your user pool
Token Source: authorizationToken
- In the Resources pane, select the Method Request for the API resource method you wish to update.
- Set Authorization to use your new Cognito authoriser. You may need to refresh the page if it doesn’t appear in the list.
- Deploy your API to a new or existing stage.
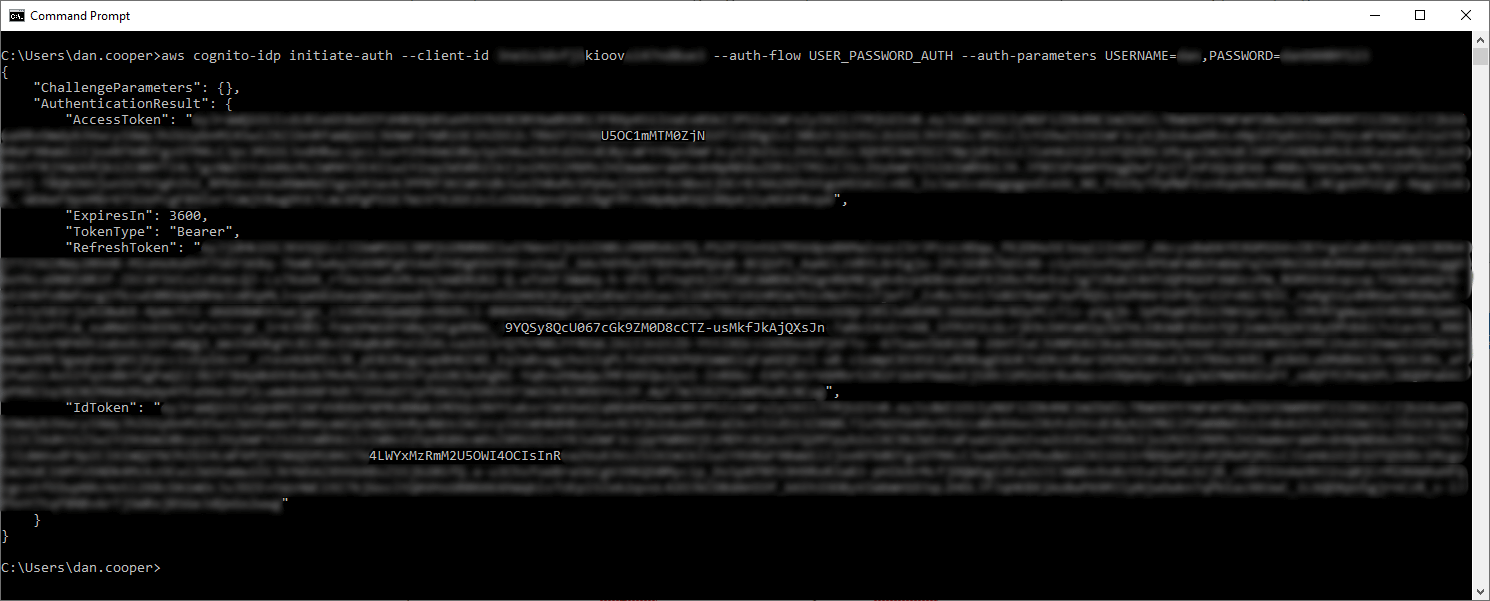
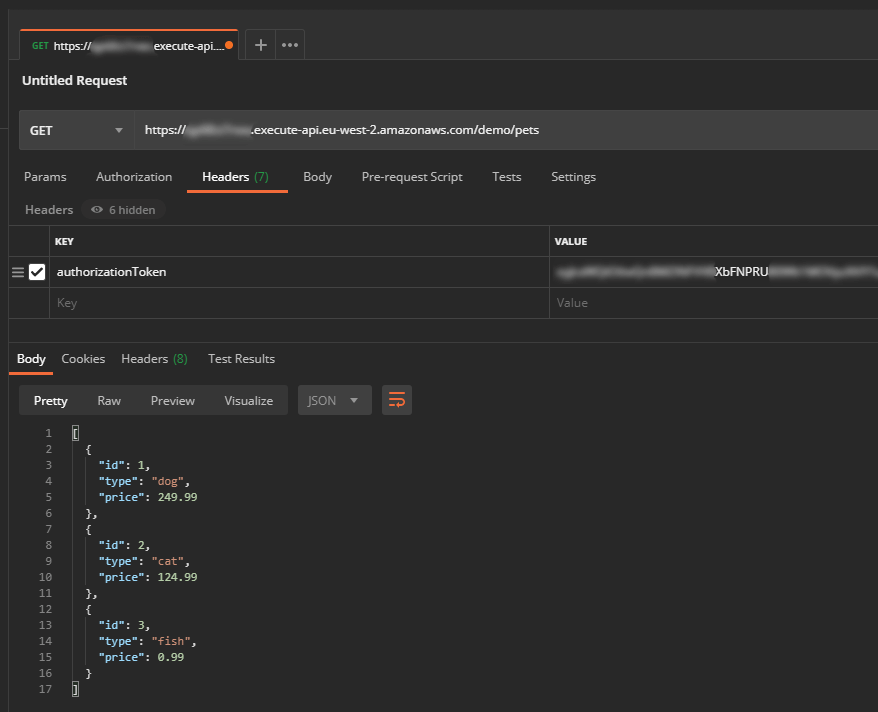
- Try a request to the API resource method using Postman. The request must include a valid Cognito token in a header key called authorizationToken (or whatever you specified above). You can generate a token (called IdToken) by logging into your user pool or by running this AWS CLI command:
aws cognito-idp initiate-auth --client-id {Client App ID associated with your User Pool} --auth-flow USER_PASSWORD_AUTH --auth-parameters USERNAME={Username},PASSWORD={Password}
Cognito authorisation with user pool groups
Cognito authorisers provide access to users in a specific user pool but they don’t provide finer-grained authorisation; the sort that grants access to users in a specific group within your user pool, like an admin group for instance.
To achieve this, you need to combine your Cognito authoriser with a Lambda proxy integration. This proxies requests through to Lambda and makes the request details available in the event of the handler function.
Within the function, you can ascertain the user’s group and use that to decide whether or not to provide access. Alternatively, you can ascertain the IAM role of the user’s group (which you can attach in Cognito) and then configure your API to assume that role.
-
Finer-grained authorisation using Cognito user pools and groups, and Lambda
- Use custom code within a Lambda function to control access or assume IAM roles
Example: Use Lambda to authorise a user in specific Cognito user pool groups
-
Go to the Lambda console and create a Python function. The function below is designed to return a 401 if the user is not in a group called admins.
import boto3 def lambda_handler(event, context): groups = event['requestContext']['authorizer']['claims']['cognito:groups'] if "admins" in groups: # Do stuff return { "statusCode": 200, "headers": { }, "body": "Welcome, admin" } else: # Not authorised return { "statusCode": 401, "headers": { }, "body": "Unauthorized" } - Go to the API Gateway console and select your existing API (e.g. PetStore).
-
In the Authorizers pane, create a new authoriser:
Name: MyCognitoAuth
Type: Cognito
Cognito User Pool: The region and name of your user pool
Token Source: authorizationToken
-
In the Resources pane, create a new resource with a GET method:
Integration type: Lambda function
Use Lambda Proxy integration: Yes
Lambda Function: The name of your new Lambda function
- Select the Method Request for the API resource method you just created.
- Set Authorization to use your new Cognito authoriser. You may need to refresh the page if it doesn’t immediately appear in the list.
- Deploy your API to a new or existing stage.
- Try a request to the API resource method using Postman. The request must include a valid Cognito token in a header key called authorizationToken (or whatever you specified above). You can generate a token by logging into your user pool or by running this AWS CLI command:
aws cognito-idp initiate-auth --client-id {Client App ID associated with your User Pool} --auth-flow USER_PASSWORD_AUTH --auth-parameters USERNAME={Username},PASSWORD={Password}
Example: Use Lambda to assume the IAM role associated with a Cognito user pool group
-
Go to the Lambda console and create a Python function. The function will try to assume the IAM role associated with the user’s Cognito user pool group. Note, the role needs the execute-api:Invoke permission and a trust policy to allow users in the account to assume it.
import boto3 def lambda_handler(event, context): role = event["requestContext"]["authorizer"]["claims"]["cognito:preferred_role"] client = boto3.client("sts") # Assume first role found response = client.assume_role(RoleArn=role, RoleSessionName="AssumedRole") output = { "statusCode": 200, "headers": { }, "body": "Group role has been assumed" } return output - In the Cognito console, check you have associated an IAM role with the user pool group of your user.
- Follow the rest of the steps in the previous example.
Lambda authorisers
There is another option for when IAM and Cognito don’t fit your use case: Lambda authorisers. This type of authoriser enables you to control access using your own authentication and authorisation methods using Lambda.
-
Authenticate and authorise using Lambda and your own user database
-
Supports caching for improved performance
- Needs to return an IAM policy document plus any custom key value pairs which may be useful downstream
Example: Create a Lambda authoriser using a Python blueprint
-
Go to the Lambda console and create a Python function using the api-gateway-authorizer-python blueprint.
-
Go to the API Gateway console and select your existing API (e.g. PetStore).
-
In the Authorizers pane, create a new authoriser:
Name: Lambda
Lambda Function: Enter the name of your new Lambda function
Token Source: authorizationToken (or whatever you specified in the Lambda function)
Authorization Caching: Recommended but may wish to disable during this example
-
In the Resources pane, select the Method Request for the API resource method you wish to update.
-
Set Authorization to use your new Lambda authoriser.
You may need to refresh the page if it doesn’t appear in the list.
-
Deploy your API to a new or existing stage.
- Try a request to the API resource method using Postman. The request must include a dummy token in a header key called authorizationToken (or whatever you specified above).
Further options
Have you found any other ways of controlling access to your API in API Gateway? Get in touch and let me know.
